Sunday, September 18, 2011

I'm back!!

I didn't give up on blogging, my computer just broke down. The trusty old laptop had been through a lot these past few years and finally choked out the near the beginning of summer. Since we had sunk all our savings into our new house and the setting up of said new house, I had to wait a while to allocate funds for replacement. Now I'm officially back up and running. Here's a few cool photos from this summer just so my come back post isn't totally boring.


This is Babe Jr with a sparkler.  I shot this using a long shutter speed and a tripod in case your wondering how I did it. It was a lot of fun taking these but you have to keep really tight patterns to make out the shape.  Only a few of them I took are obvious, its best to keep with something simple.


And here's a nice shot of Mr. Backwoods in his natural habitat.  This was taken the same day as my new header pic.  I'd begged him for a few weeks to get me back up to the top of the mountain in the evening so I could get some sunset pics.

And speaking of the new header, you may have noticed my little remodel.  I decided it would be more logical to have my blog title actually match the web address.  My posts have gravitated more towards projects I've done (which are often things I've made because I can't find them in stores in our super small town) or anecdotes about living in the backwoods, moving away from philosophical ramblings.  So the new title just made more sense all together.

I documented a few of my projects over the summer and still have tons of them in the works, so more crafty stuff will be coming soon.  And if you're reading this, thanks for not giving up on me.

Tuesday, June 7, 2011

Easy Improvised Roman Shade

As promised, here are the directions of how I made the shade in my kitchen.  I ran across this Centsational Girl Tutorial a few weeks ago and decided that was the look I wanted.  She does a much more professional job than me, using a black out lining and a real sewing machine.  I chose to wing it.

While trying to choose the fabric for this shade, I noticed there was only 3/4 yard of this mixer fabric left in stock, so I went on and ordered it.  I thought it was really cute, so even if I didn't make the curtain, I would find a use for it.  The first thing I did was lay it out and cut it the width I wanted it to be plus 3 inches.  Normally you would add 4, 2 inches for seam allowance on each side, but I was going to work with the selvage edge and only turn under once on that side.   Because it was a remnant, I didn't trim any length off other than to square up the cut.


Then I trimmed off the corners.  This makes them much neater when you fold the seams under becuase there is less fabric to bunch.


Then I broke out the iron.  Well, my Step-mom's iron.  I still haven't found mine through unpacking, but her's is much nicer.  When you press the little steam burst button, steam actually came out!  Mine works like a really dangerous super hot squirt gun.  Anyway, you iron it all flat, then fold over one side and iron a nice crease.  I started on the selvage edge since that one was the straightest.  Then I measured and cut the amount of seam tape I would need.


The cats are my ironing board cover, not fabric for an oddly themed feline room or anything.  It came that way.  Once I had the piece of seaming tape cut, I carefully placed it under the fold making sure it was completely covered.  This is important, if you iron directly over seaming tape it gunks up the iron and makes your Step-mom really mad, or ruins a dress shirt later unexpectedly.  I leaned this lesson with a shirt early on, so my Step-mom was happy when I returned her iron.  Anywho, its vital that you use the steam setting.  If the the seam tape doesn't get that moisture it won't adhere properly.  I once even improvised by placing a damp wash cloth between my iron and the project fabric when my steam setting wasn't working.  For the opposite non-selvage edge, I folded under and pressed, then folded under and pressed again before using the seaming tape so the raw edge would be turned under.  Once I started the top and bottom seams I made sure to be careful to line the corners up nicely while folding and pressing.  This is where the earlier trimming pays off.

Once all four corners are done, how you finish the top depends on how you are hanging the shade.  I already had a curtain rod in place, so I made a rod pocket.  I used the same process as making the seams, I just folded under about 2 more inches to make room for the rod and placed the seam tape right at the edge of that fold.  Often, the fabric is just stapled to a piece of wood then mounted above the window, so nothing additional is necessary.

Now I was ready to add the ribbon.  I didn't actually cut it until I had it completely attached, I just rolled along the spool as I ironed.


I measured 2 inches from the edge and stuck a few stick pins in right through to my ironing board to hold the ribbon in place.   I started on the top edge leaving an inch or 2 or ribbon hanging over so I could turn it under and attach nicely on the back.  I measured out 2 equal pieces of seam tape and had to sort of overlap them so they would stick out under the ribbon.  I had put pins on both sides of where the ribbon would sit, so that helped corral the seam tape into place.  Then I just ironed it on the same way I did the seams.  Once I got near the edge, I made sure to stop so that I would have a nice 2 inch border on the bottom as well, and carefully folded and pressed the ribbon into a nice corner and used a few small pieces of seam tape to stick it in place properly.  Then I used the same process across the bottom, carefully folded and pressed the other corner, and ran the ribbon right back up the other side to the top.  I should have taken more photos of this process, but I couldn't hold the iron, pins, ribbon, seam tape, and my camera.  Once I had the ribbon secured to the front, I trimmed it off the spool leaving and inch or so extra at the top, pressed both ends down, and attached them to the back of the shade.

Now its time to make your pleats.  This was pretty easy.  You could get really mathy and decide how many pleats you want then divide the total length by the size of the pleat plus and inch for the fold, but I just sort of laid it out and folded until it looked pretty good, then checked quickly with my little ruler to make sure they were roughly the same size between folds.  Then you press it all nicely.

DIY easy no sew roman shade

Now comes the only bit of real sewing I did.  I hand stitched the edge where the folds are so that it would stay folded.  I hadn't planned to place anything in it to weight it down, but it wanted to hang kind of funny without it.  Centsational girl used narrow wooden dowels.  I didn't have any of those, but the finish guy from the mobile home company left lots of extra paneling trim in case we might need it.  Its so thin I was able to cut it with scissors or snap it in half easily, so it worked perfect.  There are 2 pieces laying right on the little pockets the folds make in the back.  Since I hadn't lined it, it still sagged a little in the middle, so I put one or 2 small stitches in the middle of the shade right above each piece of paneling trim.

DIY easy no sew roman shade

Ta Daa!!  All done in about an hour without a sewing machine in sight.  Easy peasy.

Sunday, June 5, 2011

Getting the house together

I've been busy this week with unpacking and catching up on laundry and dishes since everything was dirty from being in storage.  Here's a sneak peak of some of the fun things I've got done.

The living room.  The drapes are staying for now.  A few of my throw pillows have a bit of the coppery color in them, so it works until I can afford new ones.  Nothing I already owned looked better here.


This is the Terrible Terrier's preferred spot to bark at things outside.  The deer was a gift from Babe Jr. to Mr. Backwoods.  I contemplated spray painting him gloss white so he would be more modern, but he has round glass eyes rather than sculpted ones so I was afraid it would look like some creepy albino demon deer.  He'll probably find a less prominent location later on.

The wardrobe our friend was going to throw out.   Its sitting by the front door and currently used as a coat closet and place to corral shoes as they are shed upon entering.


It still needs a little work.  You can tell I haven't refinished the drawers.  I'll post the whole process once its complete.  I also don't normally decorate in a lodge/hunting theme.  Mr. Backwoods hasn't even actually been hunting in several years.  But, somehow the only set of antlers he has along with a ceramic deer both ended up in the same room.  Go figure.  I really do like the looks of them sitting on top of this piece of furniture though.  They will probably stay there since they are safe from harm (the Mr. is overprotective of them) and are in a spot where no one can get impaled on them.

And the kitchen window.


As you can see I went with the mixer fabric.  I took pics of the process of making this shade, I'll try to get that posted this week.  There's still a lot to do, I'll keep you updated throughout.

Monday, May 30, 2011

A recipe so that you don't forget me

I've been busy trying to get the the house together this week and haven't had much time to post.  I'm still in the  middle of several unfinished projects, so I promise I'm working on fun things to show later.  We finally went to our old town, rented a HUGE truck and emptied out our storage building on Saturday.  Now my house is a maze of boxes stacked almost to the ceiling.

About 2 months ago I discovered Smucker's Strawberry and Blueberry syrups and became temporarily obsessed with french toast.  I love the vanilla cream filling restaurants like IHOP and Bob Evan's use in their desserts disguised as breakfast, so I did some googling and adapted a recipe to use what I had on hand.  Here's what I came up with.

Strawberries and cream stuffed french toast
 
Vanilla Cream Filling

8oz Cream Cheese
1/2 cup of powdered sugar (may be adjusted to taste)
1/4 cup sour cream
1/2 cup milk
1 tsp vanilla extract

Let the cream cheese soften then mix all ingredients well with an electric mixer or whisk.  This can be kept in the refrigerator for a few days if you have leftovers, but it probably won't last long because you will want to eat it right out of the mixing bowl.  It is wonderful on french toast, pancakes, or crepes.

I made french toast (I always add milk, vanilla extract and cinnamon to my egg mixture) topped with fresh strawberries that were cut the night before and put in the fridge with a little sugar so they'd have time to make a little syrup of their own, powdered sugar, and Smucker's strawberry syrup.  The cream filling is in between the layers.

Strawberries and cream stuffed french toast

This may or may not have been responsible for at least 5 lbs of weight gain in the few weeks after I learned to make it.  Take caution and try your best to use in moderation.

I'm sure I'll take time this week to break from cleaning and unpacking to do something crafty or take photos of something fun.  I actually have my kitchen curtain project all planned and as soon as I find my iron and figure out what I did with my seaming tape, I can get that project done and posted.

Tuesday, May 24, 2011

Revamped Chest and Nightstand

A few years ago we were given a secondhand (possibly third or forth hand) chest of drawers and night stand to use for Babe Jr.  Once upon a time they had been cherry, but had been painted because they were dinged up or just because the family member using them previously thought white was more appropriate for her daughter's room than the original finish.  She had painted the tops hot pink and the handles and knobs were brass and porcelain with flowers painted on.  We kept the pink tops and swapped the hardware for some nice pink depression glass hardware ordered from ebay.  The look was perfect for a little girl's room and we loved it.

When the move into a new house began to approach, Babe Jr and I discussed room decor and she decided she was getting too old for all the pink and wanted to make a change.  The pieces had become even more banged up through the move and being kept in a storage unit over a period of time, and were going to need some attention anyway.  I started looking for new hardware and found the perfect set for a tween/teen girl, again on ebay, that I shared here about 2 months ago.

I had removed the glass handles and recycled them when I painted a mismatched set my mother in law had to use for my little niece's bedroom.  The new hardware wasn't exactly the same size as the old stuff, so I had to fill the holes.  This is where I learned the difference between filler and putty, then had to scrape out everything I'd filled with putty and did it over again with filler.  Here the furniture is at that stage.


I made an effort to repair some other damage done through the move as well.

furniture repair wood filler

After letting it harden a few days, I sanded everything down and applied more filler where needed.  Filler shrinks as it dries so this is almost always necessary.  I removed as much of the pink as possible to make painting easier as well.  Here it is all sanded down after the second application.


Its best to do this much sanding outside.  I was covered in pink and white dust at this point.  I would also recommend wearing a mask.


It had previously been painted using a roller, I wanted to have as clean a finish as possible so I sanded and sanded so none of the roller marks would show through.  Now its nice and smooth.

I purchased some quality brushes and a semigloss paint/primer combo so that it would have a durable finish.  The ideal thing to do for a professional really smooth finish would be to use spray paint, but with the amount of patching done that just wouldn't have been a thick enough coat to cover all the damage.  I tried to find a conditioner for latex paint that I've read about to extend dry time and cut down brush marks, but once again due to my rural area and limited shopping choices, no one carried it.  Oil based paint would give the same effect without conditioner, but it is so much messier and smelly, so I kept to my choice of latex.

I used a small artist paint brush to get in the grooves along the corners and skirting on the bottom. After a few careful coats of fresh paint, and the new blingy hardware installed, the big reveal!

painted furniture

I couldn't be more pleased.  They look brand new and are going to be awesome with the decor Babe Jr has chosen once we get her room organized and all put together.

painted furniture

She's going to have the chicest room in town.  Of course I'll post about that once its all together as well.

Thanks for looking!

This post is linked to:

Friday, May 20, 2011

Lessons learned the hard way

Today has been one of those Murphy's Law kind of days.  I finally gave up on completing any projects and decided to blog about it.  Hopefully someone will gain helpful knowledge from my fails.

#1 - Wood Putty is not the same as Wood Filler.


I reached this epiphany a few weeks ago but was holding onto that tidbit of info to post until the appropriate time.  Wood putty comes in all different shades.  The furniture I needed it for was painted white, so I thought it would be great to fill the holes and easily cover with paint if necessary.  I spent a fair amount of time stuffing said holes full of putty.  At that time we were not yet moved in the house, so I came back a week later to sand the spots down I had patched and see if they needed reapplication or could be painted.  It was all still soft like play-doh.  At this point I took a moment to read the directions which state at the very end:  Will not harden to a sand-able surface.  I can't quite think of a purpose for which I would want to fill holes in wood and not desire it to harden, but I'm sure there is one or they wouldn't sell this stuff in dozens of colors.  I scraped all the putty out with a screwdriver (the holes were all the way through drawer fronts where old hardware had been) and headed back to the store.

#2 - If hardware does not come with a template for drilling holes, make one.


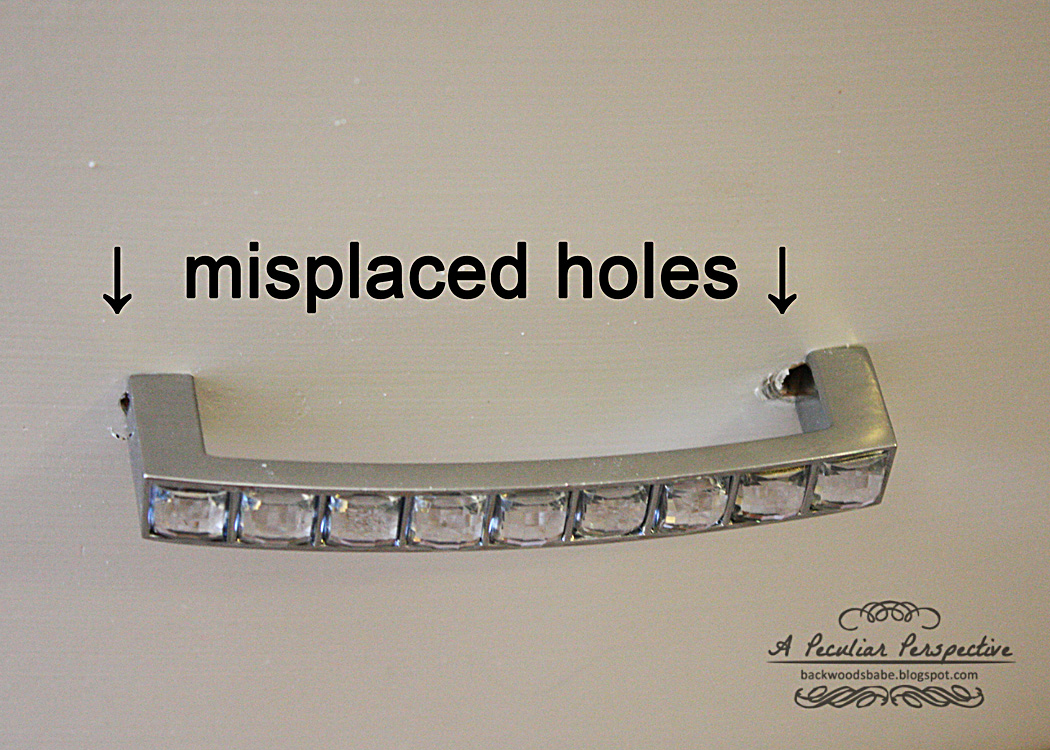
I was only off by about 1/4", but its pretty obvious.  Now I have to fill another hole.  A template is not that hard to make.  I even had graph paper available.   After this foul up, making a template was as easy as cutting a piece of graph paper the same height as the drawer front.  Then I centered the handle on the page by counting the lines and poked holes through the paper into the screw holes in the handle with a pencil.  I laid the paper template on the drawer front and only had to measure to make sure the edges were even from both ends so that it was centered vertically and horizontally.  I marked where to drill through the holes I poked in the paper.  The template took about 3 minutes to make, but it saved me an hour in correcting screw up time.

#3 - This is a multi-part lesson. 

A.  When you are moving, if you disassemble anything, label all the parts and if possible, put any screws bolts etc in a ziplock bag and tape it to the item they were removed from.  If you don't do this, you will lose them and you will have to contact the manufacturer to purchase more or get specifications so you can find them in your hardware store.

B.  If you have reassembled an item with working parts, or the item has been sitting unused for a long period of time, ensure it is working properly before you expect to use it.  If not your kitchen might look like this for an indefinite period of time.


We learned both of these with our refrigerator.  Mr. Backwoods had to remove the doors to get it though the door to the house.  He was in a hurry that day to get somewhere else after delivering the appliances, so the doors were left laying in the living room floor and who knows where the screws went.  Over  a month and a search for hardware later, he put the doors back on.  I still had some heavy duty cleaning to do on the shelves of the doors where they had mildewed while in storage, so we didn't yet plug it in.   I cleaned it all up and left it open overnight.  The next day I bought milk and a few other necessities.  I packed them in and plugged in the fridge only to realize a few hours later that even though it was running, it wasn't getting cold.  I didn't have a cooler nor do we live anywhere near a store that sells ice, so at 2am I cooked up 2 lbs of smoked sausage.  Here are some of the casualties of the faulty fridge the next day.


Two people can only eat so much smoked sausage before bedtime.  I'm really glad I am not opposed to drinking black coffee.  Mr Backwoods risked it by using the creamer that had been out all night.  He seemed ok when he left for work, hopefully that decision didn't turn into another lesson learned the hard way later in the day.

Thursday, May 19, 2011

Another Fun Wreath

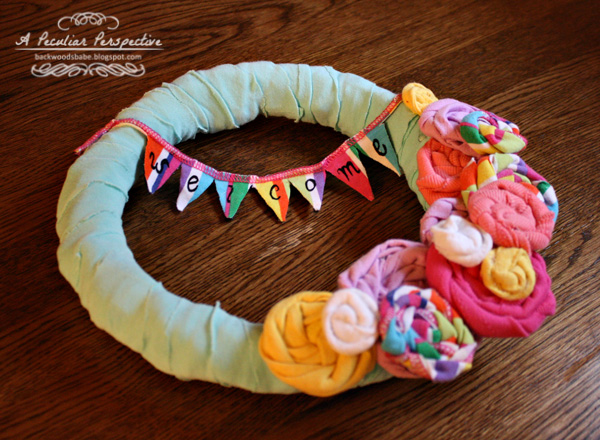
The spring wreath I made in March has already faded from the sun and was looking a bit sad.  We don't have a covered porch yet and the house faces east, so the paper roses were in pretty bad shape.  Fabric rosettes are on everything right now, I've seen throw pillows, headbands, jewelry, clothing, quilts, you name it.  So I decided to stick some to my wreath.

rosette wreath

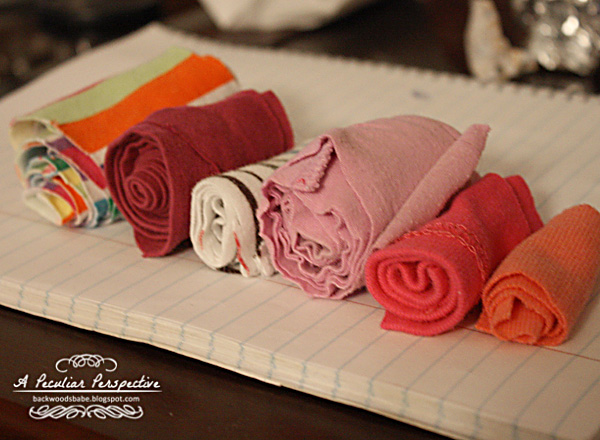
They're pretty simple to make and you can use scrap fabric.  I wanted an variety of bright colors, so I used  some old T-shirts of Babe Jr's that were stained or too small.


This was a really good project for her to help with.  She's old enough to wield a glue gun now, and was very helpful in cutting the shirts into strips and efficiently rolling them into little bundles.


Here's how we made each rosette.  You start with a circle of fabric almost the size of the rosette you want.  Felt works well because its thick and you are less likely to burn yourself when you are gluing to it.  First you just bunch up the end of a fabric strip and glue it to the middle.  Then you start to twist the fabric around - sort of like making a bun with your hair, and glue it to the felt as you go.

how to make fabric rosette

You just keep twisting, turning, and gluing.  Once you reach the edge of the felt, glue to the side of the last row of twisted fabric so that your felt won't show.

how to make fabric rosette

You can trim the fabric strip once you've gone all the way around enough to cover the edge of the felt, or you can keep gluing the fabric twist to itself until you get close to the end of your strip if you want a bigger rosette or just don't want to waste a bit of extra fabric.  Then you just fold the last bit of fabric under and glue it to the bottom.

how to make fabric rosette

These are extremely forgiving.  How tight you twist and bunch determines the look of the rosette.  A loose messier rosette looks more like a flower, while a really tightly twisted rosette resembles more of a lolly pop.

fabric rosettes

Stitching and seams along your strip of fabric add interest as well.  The smallest yellow and white ones I made from the spaghetti straps cut from a tank top.  The messiest looser ones were actually the ones I liked best. 

To assemble the wreath once my rosettes were made, I just wrapped the same wreath I took the paper rosettes off of with several strips of light teal fabric.  I only had to glue the tip to start out then the end to secure it in place.  Then I arranged and stacked my rosettes and glued them once I was satisfied with the positioning.  Some felt leaves would have looked really cute added in, but I didn't have any green felt, and even after checking, my Walmart only sells a really dark green that I didn't care for.

I wanted a little something more, so I decided to add a little "paper" welcome banner.


This was pretty simple, too.  I used a strip of the striped fabric that had been surged along the edge.  To stabilize the flags so they wouldn't curl up, I glued triangles of felt to the back of the strip just under the surging, placed where flags would hang if the surging were string.  After gluing the triangles down, I cut out the triangle shaped pieces of striped fabric between each of the ones glued to felt and then trimmed off all the extra so the surging would make long enough strings to attach to the wreath.  Voila!  A mini flag banner.  I used a black gel pen to write the letters on each flag and a dot of glue to "tie" it to the wreath.

fabric rosette wreath

I still haven't found my clear wreath hook, or bothered to purchase a new one, so I used a cord salvaged from more old ill fitting clothes to tie it to my door knocker.  Hopefully it will hold up to the sun a little longer than the the paper covered version, but if not it was a zero dollar investment using all recycled materials, so no big loss.  Plus I still have a whole bag of cut up T-shirts, so I can make another.

These were so fun, and easy that I'm going to find some more projects to work them into.  I've already made a cute hair clip to coordinate perfectly with one of Babe Jr's new outfits.

Linked to: