
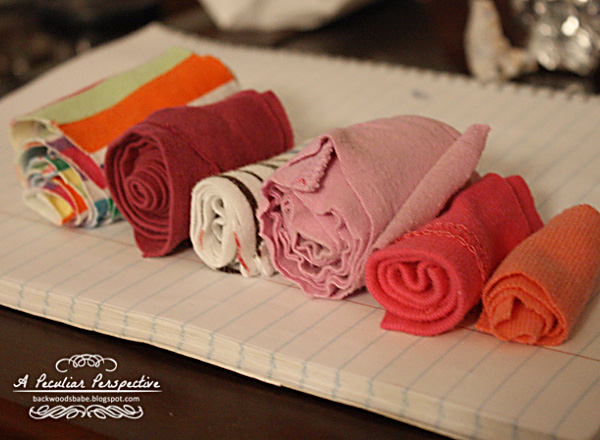
They're pretty simple to make and you can use scrap fabric. I wanted an variety of bright colors, so I used some old T-shirts of Babe Jr's that were stained or too small.

This was a really good project for her to help with. She's old enough to wield a glue gun now, and was very helpful in cutting the shirts into strips and efficiently rolling them into little bundles.
Here's how we made each rosette. You start with a circle of fabric almost the size of the rosette you want. Felt works well because its thick and you are less likely to burn yourself when you are gluing to it. First you just bunch up the end of a fabric strip and glue it to the middle. Then you start to twist the fabric around - sort of like making a bun with your hair, and glue it to the felt as you go.

You just keep twisting, turning, and gluing. Once you reach the edge of the felt, glue to the side of the last row of twisted fabric so that your felt won't show.

You can trim the fabric strip once you've gone all the way around enough to cover the edge of the felt, or you can keep gluing the fabric twist to itself until you get close to the end of your strip if you want a bigger rosette or just don't want to waste a bit of extra fabric. Then you just fold the last bit of fabric under and glue it to the bottom.

These are extremely forgiving. How tight you twist and bunch determines the look of the rosette. A loose messier rosette looks more like a flower, while a really tightly twisted rosette resembles more of a lolly pop.

Stitching and seams along your strip of fabric add interest as well. The smallest yellow and white ones I made from the spaghetti straps cut from a tank top. The messiest looser ones were actually the ones I liked best.
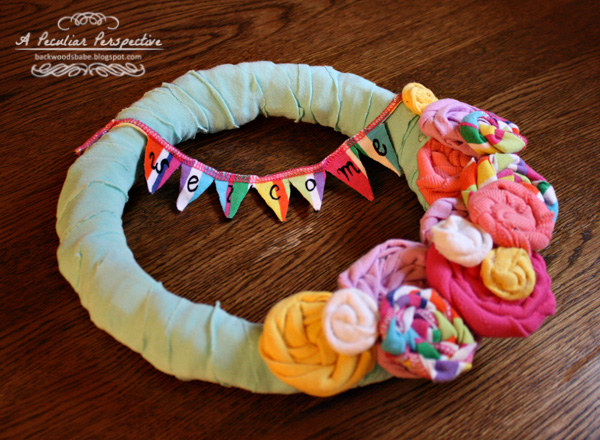
To assemble the wreath once my rosettes were made, I just wrapped the same wreath I took the paper rosettes off of with several strips of light teal fabric. I only had to glue the tip to start out then the end to secure it in place. Then I arranged and stacked my rosettes and glued them once I was satisfied with the positioning. Some felt leaves would have looked really cute added in, but I didn't have any green felt, and even after checking, my Walmart only sells a really dark green that I didn't care for.
I wanted a little something more, so I decided to add a little "paper" welcome banner.

This was pretty simple, too. I used a strip of the striped fabric that had been surged along the edge. To stabilize the flags so they wouldn't curl up, I glued triangles of felt to the back of the strip just under the surging, placed where flags would hang if the surging were string. After gluing the triangles down, I cut out the triangle shaped pieces of striped fabric between each of the ones glued to felt and then trimmed off all the extra so the surging would make long enough strings to attach to the wreath. Voila! A mini flag banner. I used a black gel pen to write the letters on each flag and a dot of glue to "tie" it to the wreath.

I still haven't found my clear wreath hook, or bothered to purchase a new one, so I used a cord salvaged from more old ill fitting clothes to tie it to my door knocker. Hopefully it will hold up to the sun a little longer than the the paper covered version, but if not it was a zero dollar investment using all recycled materials, so no big loss. Plus I still have a whole bag of cut up T-shirts, so I can make another.
These were so fun, and easy that I'm going to find some more projects to work them into. I've already made a cute hair clip to coordinate perfectly with one of Babe Jr's new outfits.
Linked to:

What a fabulous creation.
ReplyDeleteI love it. My daughter has an entire drawer dedicated to t-shirts she is saving to make something from. This just might be it.
ReplyDeleteGreat idea! It looks really cute on your door.
ReplyDeleteThat is adorable..You make everything seem so easy....I would love one....
ReplyDeleteHow creative! And you did a fantastic job with your directions. Now, if following will only turn out to be easy. . . (I'm not known for co-ordination!)
ReplyDeletelove the wreath! such a great idea! i might have to try this one sometime! thanks for sharing.
ReplyDeleteyour newest follower,
Lindsey @ I'd Rather Be Crafting